Showing posts with label main dishes. Show all posts

Wednesday, June 6, 2012

Chicken Pot Pie

Upon request from hubby, chicken pot pie was our dinner yesterday.  Sometimes hubby requests things, and at dinner time he finds that they're not what he expected.  Knowing this, he gave specific things he was looking for in his chicken pot pie.  
Real pie shell, not a casserole.  Thick and creamy inside.
So I set out to look for something easy, probably with frozen mixed veggies and cream of chicken soup.  The recipe I ended up with includes neither of those things!

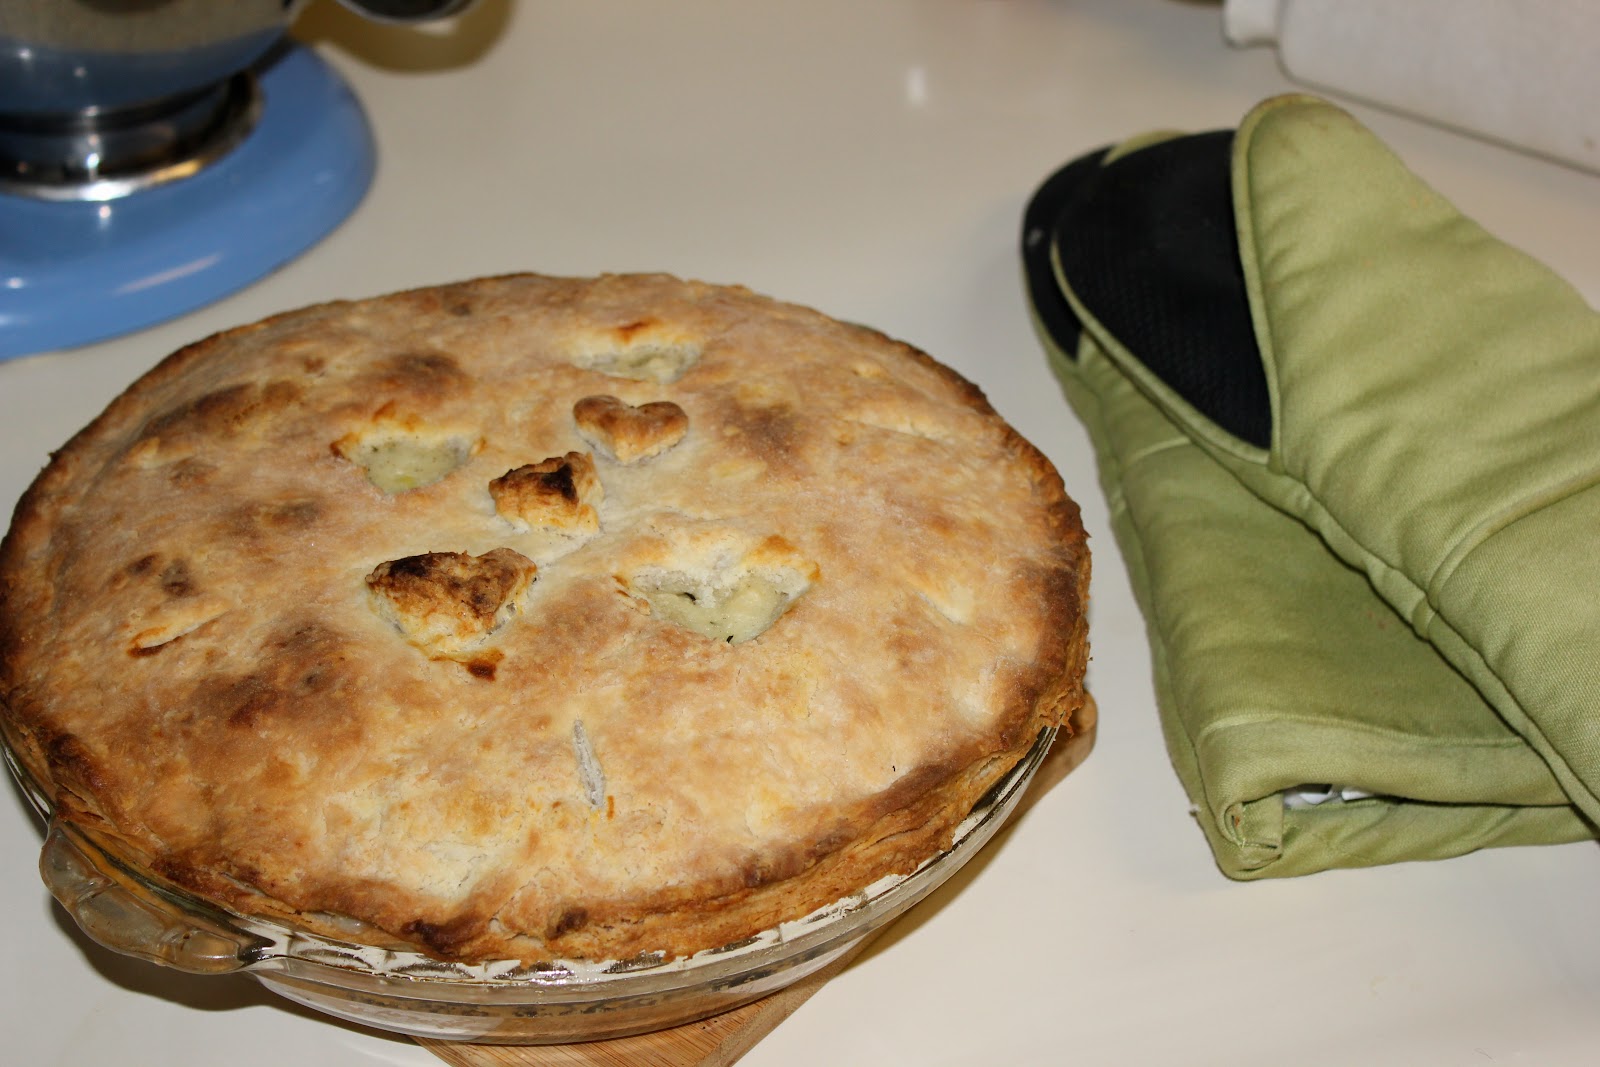
After checking some of the blogs I follow and trust, I still didn't have what I was looking for.  I moved on to google and clicked on a link to Taste of Home.  This recipe has excellent reviews, so I decided to go for it.  It was not difficult, but was a little time consuming.  Probably would have been a little less time consuming if I hadn't shattered a pie plate.  Really, shattered.  Good thing this yummy comfort food would be coming out of the oven an hour after that disaster.  I tend to burst into tears every time that I break something glass.   Yesterday marks the first time I have broken something glass in our house and NOT cried. Woo hoo!  Luckily I had 2 pyrex pie plates, so pictured below is the other one.
Okay, back to the food.

This chicken pot pie was excellent!  Nick said "Yes" to "Better than store bought?"  
After another minute of chowing down he said "Better than Costco."  I guess Costco doesn't fit into the same category as any other store?  According to Nick they have very good chicken pot pie... so if you're too busy (or lazy) to make this, you can buy it there.  But this is better than Costco, so it won't be as good.

This was my first time cutting something out of the top of a pie like that.  Do not make fun of my little hearts.  I was thinking nobody but Nick would see it, so it didn't matter.  As I put the pie in, I realized I was going to take pictures to blog.  Oh well!  Also, my crust was slightly overdone, as you can see, by the time I checked it at the minimum recommended cooking time (35 min).

This recipe makes two pies - save one in the freezer for a rainy day.  Or a busy day when you don't have time to make dinner :)


My suggestions: Use Yukon Gold potatoes.  Yum.  
And I added an extra half a cup of peas - changing the recipe from 1 cup peas to 1 1/2 cups of peas.
Use a flaky pie crust.  I used the one with the Cook's Illustrated Lattice-Top Peach Pie, which I blogged last year.  You can view it on my blog here.  This has been my go-to crust since making that pie.  Remember to double your pie crust recipe! 


Chicken Pot Pie
(Makes two 9-inch pies)
• 2 cups diced peeled potatoes (suggestion: Yukon Gold)
• 1 3/4 cups sliced carrots
• 2/3 cup chopped onion
• 1 cup butter, cubed
• 1 cup all-purpose flour
• 1 3/4 tsp. salt
• 1 tsp. dried thyme
• 3/4 tsp. pepper
• 3 cups chicken broth
• 1 1/2 cups milk
• 4 cups cubed cooked chicken
• 1 1/2 cups frozen peas 
• 1 cup frozen corn
• Pastry for two double-crust pies (9 inches)

1.  Place potatoes and carrots in a large saucepan; cover with water.  Bring to a boil.  Reduce heat;  cover and simmer for 8-10 minutes or until crisp-tender.  Drain and set aside.

2.  In a large skillet, saute onion in butter until tender (Yes, a whole cup of butter! Remember, this is your base for two pies).  Stir in flour, salt, thyme and pepper until blended.  Gradually stir in broth and milk.  Bring to a boil; cook and stir for 2 minutes or until thickened.  Add the chicken, peas, corn, potatoes, and carrots; remove from heat.

3.  Line two 9-inch pie plates with bottom pastry shells.  Fill shells with chicken mixture.  Roll out remaining pastry to fit top of pies.  Cut slits or decorative cutouts in pastry.  Place over filling; trim, seal, and flute edges.  

4.  Bake one pie at 425° for 35-40 minutes or until crust is lightly browned.  Let stand for 15 mintues before cutting.  Cover and freeze remaining pie for up to 3 months.

To use frozen pie: Shield frozen pie crust edges with foil; place on a baking sheet.  Bake at 425° for 30 minutes.  Reduce heat to 350°; bake 70-80 minutes longer or until crust is golden brown.


Source: http://www.tasteofhome.com/Recipes/Chicken-Potpie-3

Thursday, November 10, 2011

Easiest Mac n Cheese


Not just easy - probably the easiest mac n cheese ever.  Maybe even easier than Kraft Mac n Cheese.  No boiling water, testing your noodles, draining pasta.  It's just a dump and go.  And also...  it's excellent!

We had this at one of Nick's family reunions and I enjoyed it so much I asked one of Nick's aunts if she could get us the recipe.  She e-mailed it to me and we made it for a Steelers game a few weeks ago.  I was excited that not only was it simple, but it was a hit!  Here's the easy peasey mac n cheesey recipe!
Wait til you see the directions for this one!


Mac n Cheese 
•1 1/2 c. uncooked macaroni
• 4 c. milk
• 1/2 c. melted butter
• 1 1/2 c. cheese (velveeta and/or whatever else you have)
• 1 tsp. salt
• dash pepper

Mix everything in a 9 x 13 pan and bake for 3 hours @ 235°F.


I stirred whenever I passed in the kitchen, probably 2 times.  It was runny when I took it out but it will congeal a lot as it cools.

Saturday, October 29, 2011

Pretty darn good pork and sauerkraut


Did you know that Giant Eagle sends coupons in the mail specific to what you?  I didn't know, until about a month ago when we got some coupons for $1 off each for bananas, Kraft grated parmesan cheese, pork, strawberries, and a few other things I can't remember.  After tearing apart the coupons and putting them in my purse I ended up carrying them around for around for almost a month.  During what was supposed to be a quick in-and-out grocery trip, I remembered them, (and remembered that we needed milk) so my little shopping basket became quite heavy.  All this to say, I bought a pork roast and was looking for a good pork roast recipe.  I found this one and am glad I did!  Nick said, "Add this to the 'make before not too long' list" so it must be good!

I had a small roast and squeezed it into a pretty small covered dish, covered it with the veggies and spices, and then squeezed the rest of my veggies into another small covered dish.  As a result of my squishing everything into small dishes there was a ton of liquid in both dishes.  The pork was more or less boiled in the juices from the sauerkraut and diced tomatoes.  This was probably not how it was intended to be, but it worked for us!  Also, when I made it I had a small roas, so I halved the sauerkraut, tomatoes, etc.  Here's the recipe:

Pretty darn good pork and sauerkraut
• 41 oz sauerkraut
• 1 - 4 lb. boneless pork loin roast
• 1 (14.5 oz.) can diced tomatoes, undrained
• 3 Celery ribs, cut into 1-inch pieces
• 2 medium carrots, cut in half widthwise and quartered (I substituted with a handful+ of baby
• 1 medium onion, quartered
• 3 tablespoons brown sugar
• 1/4 cup minced fresh parsley
• 4 bay leaves
• 1/2 tsp. dried oregano
• 1/4 tsp. pepper

1.  Preheat oven to 325°.  Place half of the sauerkraut in a large roasting pan.  Place pork roast over sauerkraut; top with remaining sauerkraut.  Spoon tomatoes over top.  Arrange the celery, carrots, and onion around the roast.  Sprinkle brown sugar overtop.  Add parsley, bay leaves, oregano, and pepper.

2.  Cover and bake for 3 to 3 1/2 hours or until a meat thermometer reads 160°F, basting occasionally with pan juices.  Discard bay leaves.  Let stand for 15 minutes before slicing.


Source: allrecipes.com Sauerkraut Pork Supper


Saturday, September 10, 2011

Baked Three Cheese Eggplant


Reasons to try this:
1.  It's a vegetarian meal that doesn't include pasta
2.  How often do you eat eggplant as a main dish?
3.  Use up the rest of your ricotta cheese after making lasagna!
4.  It's a sneaky way to make your husband or whoever you will share this with eat healthy greens!

Okay, so this dish is baked eggplant topped with tomatoes, onions and spinach (or in my case, whatever greens I had from the CSA), then cheese and tomato sauce.  This was one of those recipes that I made with what was in my fridge, so we missed the yummy ricotta cheese.  The other thing that I modified in this recipe was the amount of sauce.  It called for 3/4 cup sauce.  I used an entire jar of Marinara.  What can I say? We like sauce!

Lastly... don't stack your eggplant.  Make sure it can all touch the bottom of the pan.  I had two pieces that didn't fit that I stacked on the others, and they weren't cooked as much as the others.

The recipe below includes my adjustment of sauce, but has the original directions for spinach and ricotta cheese.

Spinach (oops, I used random greens instead), tomatoes, onions, and garlic


Baked Three Cheese Eggplant
1 eggplant
• 2 tablespoons olive oil, or as needed
• 1 tablespoon garlic powder, or to taste
• 2 tablespoons olive oil
• 1 small onion, chopped
• 3 cloves garlic, chopped
• 2 small tomatoes, chopped
1 10 oz. package fresh spinach leaves
• 1/2 cup ricotta cheese
• 3/4 cups shredded mozzarella cheese, divided
• 3/4 cup grated Parmesan cheese, divided
• 1 jar of your favorite tomato-based pasta sauce
• 2 tsp. Italian seasoning

1.  Preheat oven to 350°.  Slice eggplant into 1/2 inch rounds.  Place on a baking sheet, brushing both sides with olive oil.  Sprinkle garlic powder on top and bake for 10 minutes.

2.  Heat pan to medium.  Add onions and garlic and cook for 3 minutes.  Add chopped tomatoes and spinach.  Cook and stir for a few minutes, until tomatoes have released their juices.  In a medium bowl, mix together 1/2 cup ricotta cheese, 1/2 cup mozz. cheese, 1/2 cup parm. cheese.  Set aside.

3.  Place the eggplant in a greased 9x13 pan.  Top with spinach and tomato mixture.  Spoon the cheese mixture on top.  Pour pasta sauce over the cheese, and top with remaining mozzarella and parmesan cheese.  Sprinkle with Italian seasoning.

4.  Bake for 30 minutes, or until eggplant can be easily pierced with a fork.


Layered, before baking

Source: http://allrecipes.com

Saturday, May 28, 2011

Chicken and Asparagus Alfredo


Last week I bought a really big bundle of asparagus.  We ate it multiple times... as a side dish, in stir fry, with this pasta.  I really liked it with pasta and Alfredo sauce.  And for this I cheated and used a jar of Alfredo sauce, which made it a nice easy meal after a day at school.

We are looking for the secret to juicy cooked chicken.  When I cut it into bite-sized pieces and then cook it it tends to dry out a little.  We decided we should try to cook the whole chicken breasts and then cut them up, maybe that will be better.

Chicken and Asparagus Alfredo
• Chicken breasts (1 for each person you're serving)
• Asparagus (1/2 cup to 1 cup for each person)
• Pasta of your choice
• Alfredo Sauce

1.  Begin cooking chicken in a pan with oil and set a large pot of water over high heat to boil for pasta.  When water boils add in pasta and cook according to box.  When chicken is done remove from pan and let sit until cool enough to cut.

2.  Steam asparagus in a pot with a lid and boiling water just covering the bottom for 3-5 minutes.  Cut chicken into bite-sized cubes.

3.  Drain pasta and put back in pot over low heat.  Add Alfredo sauce, asparagus and chicken.  Stir and keep over low heat just until alfredo sauce is hot. (No longer than 3-5 minutes so that it doesn't dry out).

Friday, May 27, 2011

Mustard Chicken

Pros for this recipe:
• Made with stuff I already had at home
• Only 3 ingredients
• 5 Minutes or less prep time
• Yummy (with respect to how easy it is)


This is maybe not the best chicken that I've ever had, but considering how easy it is, we said it's good enough to make again.  I've had corn flakes, bread crumbs, spice mixtures, etc. coating chicken, but I've never had French Fried Onions on chicken.  We liked this one because it was different.  Plus, I've never used French Fried Onions for anything but green bean casserole.  I like knowing that I can use them for more than one thing.

Some of the reviews on allrecipes.com said it doesn't really taste like mustard.  We thought it tasted like mustard.  Those people are nuts.  Not that it was a bad thing.  It just... tasted like the mustard that was on it.

I didn't measure how much mustard or onions I used.  I pretty much just estimated.  That's what I usually do when I coat stuff.  Then if I need more, I just dump in more.

Mustard Chicken
• Chicken breasts
• Mustard
• French fried onions

Preheat oven to 375°.  Lightly grease a glass pan.
Get out two bowls.  Put in one bowl enough mustard to cover your chicken, and in the other bowl enough French fried onions to coat your chicken.  Dip the chicken in mustard, then move it to the second bowl and coat with French fried onions.  Place in lightly greased pan.
Cook for 40-50 minutes or until juices run clear.


Source: "Juliet"at allrecipes.com

Tuesday, May 17, 2011

Shrimp Scampi


Shrimp Scampi is so easy and I just love it.  Truly - Cook pasta.  Cook shrimp.  Mix together.  Eat.

I like to be able to just throw stuff together when I can... instead of following an exact recipe.  When things have so few ingredients, like this does, thats what I do.

At the bottom are a few places where I got ideas.  I chose to add some chicken broth to make some more sauce, and a little bit of parsley.  I don't have amounts for shrimp or pasta because it really just depends how hungry you are... but I'd use the rest of the amounts for about 1/2 - a whole box of pasta, and double if you're making more than that. Here's an overview of what I did.

Shrimp Scampi
• Shrimp
• Pasta (Your choice of linguine, spaghetti, angel hair, whole wheat pasta...)
• Salt and pepper
• Parsley
• 4 tablespoons Butter
• 2 teaspoons Minced garlic
• 1/4 or 1/2 cup White wine or chicken broth
• Olive oil

Boil pasta to al dente.  While pasta is cooking heat oil in pan and begin to cook shrimp.  Add salt and pepper to taste.  Mix in 2 teaspoons mixed garlic and butter.  Once the shrimp is cooked move it to a bowl.  Add butter and chicken broth to pan.  Cook until it boils and stir to thicken.  At this point you can add a bit of corn starch to thicken it up if you want.  Add shrimp back in.  Mix in drained pasta and add parsley to taste.  Serve with garlic bread and enjoy!


Sources: Food Network, Tasty Kitchen Blog

Monday, April 25, 2011

Paige and Sarah's Famous Baked Ziti


Nick has a GMS '08 Cookbook from the summer that he spent in Vermont at the Navigator's Summer Training program, "Green Mountain Summer".  Two of our beautiful friends from Penn State, Paige and Sarah, were in charge of cooking at GMS and put together a cookbook packet at the end of the summer.  We love this ziti recipe.  And it's so easy to adapt, if you want to add meat or veggies... just do it!  Our personal favorite is adding sweet italian sausage.  Here is Paige and Sarah's recipe, with our addition of sausage.

Paige and Sarah's Famous Baked Ziti
about 8 servings
• 1 box ziti
• 2 jars spaghetti sauce
• 2 eggs
• 15 oz. jar ricotta cheese
• 3 cups shredded mozzarella
• 2 cups parmesan cheese
• 3 Sweet Italian Sausages (or spicy, if you prefer)

Preheat the oven to 350°.  Brown sausage in a frying pan.  Remove from pan and slice in half and then into  bite sized pieces.  Cook pasta according to box.  In a large bowl combine eggs, ricotta cheese, 1 1/2 cups mozzarella cheese and 1 cup parmesan cheese.  Mix until combined.  Drain pasta and add to the cheese mixture and stir well.  Stir in sausage.  Add spaghetti sauce and stir, but not too much.  Add oregano, salt/pepper, and garlic powder to taste.  Pour the mixture into a 9x13 pan.  Top with remaining 1 1/2 cups mozzarella and 1 cup parmesan.  Cover with aluminum foil and bake 40 minutes.  Remove the foil and continue baking 5-10 minutes longer, until the cheese is slightly browned.  Remove from oven and serve!

Source: GMS '08 Cookbook by Paige and Sarah

Monday, April 11, 2011

Grilled Pineapple Pork Chops

I highly recommend these.  Great for a warm night to grill and eat outside!
We had them a few days before it was warm enough... but grilling makes me want to eat outside!


The marinade for these made them really good.  They don't take that long to make (besides marinating time)... and it seems like way less to me time because I don't grill.  Nick grills for us.  
Another plus to grilling... easy clean-up!  Yay!  The recipe I used actually wanted them to be pan-fried... but grilled seems ten times better to me.  

To make these really yummy pineapple slices and pork chops, start by cutting your pineapple and some green onions and using a food processor to mix with some spices for the marinade.  They marinate for 1-4 hours, and then are ready to be grilled.  Top with the extra marinade.


Ingredients:
• 4 Pork chops
• 6 1/2-inch thick slices of pineapple  (2 cut into chunks for marinade)
• 1 bunch of scallions, sliced cross-wise into 1-inch pieces
• 1 tsp. dried thyme
• 1 Tbsp. minced garlic
• 3/4 tsp. ground allspice

Directions:
Slice 6 slices of pineapple.  Cut 2 of your slices into small chunks.  Slice scallions and place in a food processor with pineapple chunks.  Add thyme, garlic, and allspice.  Pulse until coarsely chopped.  
In a 9x13 inch pan place pineapple slices and pork chops.  Top with marinade and turn to coat.  Refrigerate for 1-4 hours.  Also refrigerate extra marinade to use as a topping with cooked pork chops.

Brush off the excess marinade before grilling.  Nick's grilling instructions:  Grill pork 7-10 minutes per side on medium heat (as hot as possible without searing).  If necessary, cut one open to check if the meat has cooked through.  Grill pineapple on top rack or med-low heat for 1/2 time of the pork chops.


Source: Everyday Food (Martha Stewart) March 2011

Monday, March 28, 2011

Easy Shake-n-bake Chicken

All you have to do is combine these in a bag...


shake your chicken in it, and bake it to get this....

As you can see, we prefer chicken legs...
But it's also because they come in 4 packs, and if we got other pieces it'd be way too much for 2 of us.
TA-DAH! Simple.

Here's the recipe I used, once again original from allrecipes.com.  I halved everything and estimated the 1/8 tsp amounts, and also used less salt.  I also added the garlic and onion powder.  Some of the reviewers said it's good without putting butter on before putting in the spice mixture... so I did 2 legs rubbed in olive oil and then in the spice mixture, and 2 with nothing but the spices so that we could compare.  Nick and I vote for definitely using olive oil or butter before putting it in the spices- the skin tastes SO much better.

Easy Shake n bake chicken:

1/2 cup all purpose flour
1 tsp. salt
1 tsp. paprika
1/4 sage
1/4 black pepper
couple shakes garlic powder
and onion powder
olive oil or 1/2 cup melted butter

Prepare flour and spices by dumping in a large ziploc bag.  Rub chicken pieces with olive oil or melted butter.  Toss them in a bag with the spices.  Shake... then move to a pan... and bake.

Source: allrecipies.com, added by Candy
http://allrecipes.com/Recipe/Easy-Shake-and-Bake-Chicken/Detail.aspx

Wednesday, March 23, 2011

Mac n Cheese


You know what I love about homemade mac n cheese?  It's so easy.  You make it once and you're an expert.  Okay, maybe I'm not an expert... but I decided I could make up my own recipe since this was the second time I did it.  Okay, okay, maybe I didn't make up my own recipe either.  But I kinda used the amount I wanted to use of ingredients instead of the amount this recipe told me to.  I recommend way more cheese than most recipes will tell you.  That's how we like it anyway. :)

My mac n cheese make-it-up-as-you-go recipe:
• 1/4 cup butter
• 2 Tbsp. flour
• 1 cup milk
• 6 oz. velveeta
• 1 cup cheddar cheese
• 1/2 box macaroni
• bread crumbs (I used bread crumbs - you should definitely use crushed crackers though)

Melt butter.  Add milk, flour, and cheeses and melt together.  Cook pasta and mix together with melted cheese mixture in a pot.  Crush 6-8 Ritz crackers and mix with 1 Tbsp. melted butter.  Move macaroni to an oven safe dish and cover with cracker crumbs.  Bake at 350° for 15 minutes or until heated through.


Or you could not heat it in the oven with the crackers.  It'd probably be just as good.

But seriously, don't use bread crumbs.  Especially when you're like me and you have crackers and are just too lazy to crush them.  It's really worth it to use crackers.  (I did the first time I made homemade mac n cheese)

Friday, March 18, 2011

Pesto Tortellini

Recipe here on Carrie's Sweet Life blog

Made this for dinner the other night.
I give it a 10 / 10 for being pretty much effortless, and still tasting good.

Sunday, March 13, 2011

Oven baked BBQ Pork Ribs

Well... I forgot to take a nice picture of the ribs.  So we have this half eaten picture from the first day.  I meant to set them up nice when we finished our leftovers... oh well.  You get the idea.


Giant Eagle has buy one get one pork sometimes... this week - I think it's this week still going on until Thursday - they had boneless pork ribs buy one get one and they had boneless pork chops buy one get one.  So pork chop recipes to come maybe later this week.  The ribs were Friday.

Recently I have gone from using allrecipes.com to using the foodnetwork.com.  I'm not sure if this was a good switch or not.  I tried a Barbeque Pork Spare Ribs recipe from there and was not a huge fan.  Actually, the recipe had two mini-recipes, and I only followed one of them.  I made the "rub" and used KC Masterpiece for the BBQ sauce.  I figured using one or the other was good enough.  Anyway, the "rub" was a mix of a bunch of spices, as pictured below...


I just thought it was crazy how many things were in this, and thought a picture was necessary.  10 things to mix together just to rub on the ribs, not even including the sauce.  I halved everything and still had way too much.  Used even less than half of the peppers to make sure it wouldn't be too spicy.  It was still a little too spicy for me.

Dry Rub for BBQ Pork Spare ribs:
•1 Tbsp. salt
•2 tsp. black pepper
•1/2 tsp. cayenne pepper
•2 Tbsp. brown sugar
•1 1/2 tsp. ground cumin
•1 tsp. ground allspice
•1 Tbsp. chili powder
•1 1/2 Tbsp. paprika
•1 tsp. garlic powder
•1/2 tsp. dry mustard


I preheated the oven to 325°.  Then I mixed the ingredients for the rub in a bowl and lined a pan with foil.  I rubbed each rib with this and then put them very close in the foil lining.  Before putting them in the oven I got another piece of foil and put it on top and sealed it around the edges.  I started cooking them for about 10 minutes, then took them out to brush with sauce for the first time.  I brushed just enough to cover them completely with a very thin layer.  I let them cook like this for an hour, then turned the temp. down to 300°, brushed with sauce again, recovered and cooked for another hour and twenty minutes.

Verdict:
Nick liked them.  He said he would've said to save the recipe, except he knew I didn't like them.
I wasn't such a fan.  The rub was too much for me.  Next time (this was BOGO, remember!) if I used the same rub I would not put as much on.  Those ribs up there in that picture are pretty covered.  The sauce was good with some of the rub in it, but there was too much cooked onto the ribs.  OR - simpler is better.  I think I'd rather just find a new rub with fewer ingredients that might be better.  This post will have to have a sequel.

Thursday, March 10, 2011

Chicken and Broccoli Alfredo


Looking around on the food network website the other day I found this page, which disgusted me with the amount of fat and calories in a typical fettuccine alfredo.  From there I found some links for "light" versions  and used one of those recipes (this one).  Alfredo sauce is easy to make and you do not need to use heavy cream for it... you probably already have all of the ingredients in your fridge!

The only problem was that there wasn't enough sauce.  I made a whole box of fettuccine which was enough for us to have hefty portions for 2 days.  The second day I made an extra recipe of sauce.  I would suggest making 1 1/2 times the recipe or just doubling it for sauce.  There could also probably be more chicken.  Considering it made about 4 servings, I might use 3-4 chicken breasts.  I also used 1% milk and eliminated the half and half from the recipe. 

 Here's how I adapted:  (Makes 4 large servings)

4 chicken tenders (or 2 chicken breasts) (I'd use more next time)
2 stalks of broccoli
1 box of fettuccine
Sauce:
2 Tbsp. butter
1 cup milk (I used 1%)
1 1/2 tsp. cornstarch
1/2 cup parmesan cheese
Garlic powder
Parsley

Turn water on to boil for pasta.  Cook chicken in a pan with a little bit of oil.  If desired, cut up chicken into small pieces.  Chop broccoli and put in a pot with just enough water to cover the bottom.  Put on the lid and put the pot on med-low for 6 minutes or until broccoli is soft.  Set aside chicken and broccoli.
Begin cooking pasta and sauce.  For sauce: Melt butter over medium heat.  Add milk and mix until hot.  Whisk in cornstarch until mixture begins to thicken.  Add parmesan cheese and continue to heat and mix until desired consistency.  Sprinkle in garlic powder and parsley.  
Drain pasta and dump pasta and sauce into large pot.  Mix in chicken and broccoli.  If chicken and broccoli are no longer hot, put the lid on and let it sit on low for 2 minutes or until it's hot.

Friday, March 4, 2011

Pot Roast


A Food Network recipe, from Dave Liberman.
Here is the link for the original recipe - Red Wine Pot Roast with Honey and Thyme.
I changed a few things...but mostly because I wasn't prepared with the right ingredients.  I had barely any honey so just used all that I had.  I thought it was interesting that it wanted me to brown the roast and sautee the vegetables first... I don't really know if it made a difference.

Ingredients:
Bottom Round Roast
Salt & Pepper
olive oil
1 onion
1 tablespoon minced garlic
1 pound baby carrots
2 cups beef broth (I use bullion cubes)
1 cup white wine - Okay, so the recipe called for red, but all we had was white and it was still good
2 1/2 Tablespoons honey
2 tsp. thyme
2 pounds potatoes, peeled and cubed

Preheat oven to 350.  Preheat a pot to medium and heat oil.
(If you have an oven safe pot or dutch oven use it!)
Rub roast with salt and pepper.  Brown all sides in your pot, about 10 minutes total.  Set aside.  Add carrots, onions, and garlic and sautee for about 5 minutes.  Add broth, wine, honey and thyme and stir to combine.  Then add roast to liquid if you have an oven safe pot, or move it all to a roast pan.

Cover and bake for 2 hours, turning the meat over twice.  After 2 hours add the potatoes and remove the lid.  Bake for another 30-45 minutes, until both the potatoes and the meat are tender.


So...it was good.  The outside cuts were especially tender and really good.

My question - is it worth using good wine to cook?  Would it have been just as good if I used all broth?


Wednesday, March 2, 2011

Easy Balsamic Chicken Breasts


This was pretty good for an easy-to-do chicken with not too many ingredients.  
Not spectacular, but pretty good.  I like chicken that you bake because I can do other stuff while it cooks... so I think I prefer this to a similar recipe I made a few weeks ago cooked in a pan.

Ingredients:
Chicken breasts
Minced Garlic
Rosemary
sprinkle of salt and pepper
olive oil
balsamic vinegar

Here's what I did:

Heated the oven to 450.  Rubbed chicken breasts with some minced garlic, rosemary, a sprinkle of salt and pepper.  Let sit for a little bit.  (Little bit = until my potatoes were half done so that they would be done the same time as the chicken).  Put some olive oil in my corningware and put it in the oven for a few minutes so that it would thin out and cover the bottom (not really necessary to heat it).  Stuck the chicken in.  Cooked for 10 minutes.  Flipped the chicken, poured some balsamic vinegar on, cooked for 15 more minutes.  Done!  Don't forget to pour on some of the leftover juices!

Our easy meal!
This recipe inspired by: Balsamic Chicken

Nick likes taking pictures of food for me.
I told him I wasn't going to blog about steaming broccoli...
But he had fun capturing pictures of the steaming broccoli anyway.

Wednesday, February 23, 2011

Spaghetti Carbonara

Saw this recipe and said yes to it for one important reason: BACON!   I am really a bacon lover.  And in this recipe your use some of the bacon grease for your sauce...which gives it wonderful flavor.  It's really easy too.  My only issue was getting the bacon to be crispy.  I had a hard time cooking "chopped bacon" - had to cook it for longer than I thought because every time I stirred it there was still some not getting cooked.  So all my bacon wasn't crispy.  But I'd start on that before you cook your pasta because it takes longer than spaghetti anyway.  Here's the link to the original recipe, from allrecipes.com.
Makes 8 "servings" - depends what you call a serving when you're hungry for this!

1 pound spaghetti
1 tablespoon olive oil
8 slices bacon, diced
1 tablespoon olive oil
1/2 onion, chopped
1 clove garlic, minced
1/4 dry white wine (optional) - I used just a splash of cooking wine because I was afraid of losing liquid
4 eggs
1/2 grated Parmesan cheese
Parsley

1. Chop your bacon and cook it in a large skillet.  In a large pot, cook your pasta until al dente.  Drain pasta, return to pot, and toss with a tablespoon of oil or enough so that it will not stick to your pot.

2. Remove bacon from skillet and drain on paper towels.  Keep 2 tablespoons of bacon grease (I didn't have that much - I kept it all!).  Add a tablespoon of olive oil to bacon grease and heat.  Add chopped onion and cook until translucent.  Add minced garlic and cook one minute.  Add wine if desired and cook another minute.

3. Add skillet mixture and bacon to spaghetti and mix well.  Re-heat spaghetti on med-low or low.  Add more olive oil if it is sticking to the bottom of the pan.  

4.  Beat eggs.  Add parmesan cheese and mix well.  Pour into spaghetti and continually toss while heating.  Sprinkle in parsley and mix.


Ta-dah!  Don't forget some garlic bread!

Saturday, February 19, 2011

Nick's Cooking Adventure - Venison steaks

Nick decided last night that we would make venison steaks tonight.  
Okay, I'm not big on deer, but whatever.  
When Nick makes something he likes to do it all himself.
And he does a good job.

Tenderizing... a lot.

He dipped in egg + milk, then in bread crumbs.
Then cooked in a pan with olive oil for about 10 minutes.


Finished product.  


Enjoying!


My steak


Verdict:  It was okay... I think I just don't love venison.  It was REALLY tender (good pounding, Nick!), cooked to perfection... just don't love the taste of the meat.  Anyway, we have another pack in the freezer and another recipe I want to try with a marinade.... so sometime I'll have to try venison again.